Tape Art in Grade Two

The school was giving away some potted plants and I was more than happy to give them a home in my classroom. I have big windows with plenty of light and plants are a great subject for drawing, observations etc. If any of your students finish their work early you can always send them off to get a plant and draw it!

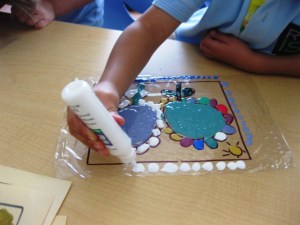
My grade two students were learning about plants in science so this was a great opportunity to integrate art with their science curriculum. I placed different pots along the tables and gave out 12×18 sized paper for everyone. The object of the lesson was to observe the plant, make an outline drawing and ‘color‘ in the still life drawing with colored tape. They started by drawing the pot. If you do this lesson, make sure the kids ‘sketch‘ their drawings so if they need to erase dark something, dark pencil lines aren’t left behind!

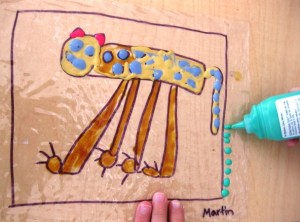
Once they were happy with their outline which had to include the pot, the pot’s rim and the plants and flowers they were ready to color in with the tape. Everyone chose a color for their pot and stuck and overlapped pieces of tape to cover the pot area. Next they chose another color for the rim and finally other tape colors for the leaves and flowers. Make sure your students use different colored tape for the different areas such as the base of the pot, the rim, the flowers, buds, leaves, details on the leaves etc. Encourage your students to stick down the tape and to tear off pieces as well as cut them with scissors.

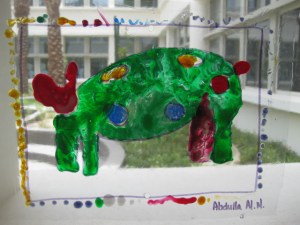
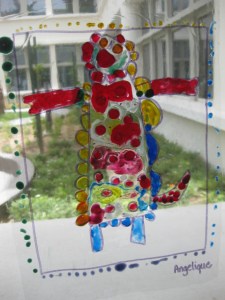
When they were finished, they added a detail to the face of the pot such as a heart, sun etc and with colored pencils lightly drew a background and table for their potted plant. Make sure it is lightly drawn so the pot remains the focus.

I loved how they turned out, don’t you? If you want to see more pictures then click here to see the slide show I created for this lesson.

Psst…

Art Lessons for Kids is on Facebook  and we are GROWING. Hit the  ”Like” button to show your LOVE  and join the conversation. You can also follow my adventures on Twitter (@Ms_Alejandra) or see what I am pinning over at Pinterest.

 Need art supplies for this lesson? Click on the link below to visit check out my new Shoppe!
ASFK banner Two 2014

Stained Glass Art in Pre-K

I save absolutely everything because I know that sooner or later I will be inspired to use it with a lesson. This is what happened with the vinyl packages that my art aprons came in. Instead of ending up in the garbage I cut them open at the seams and suddenly they were now ‘glass’ for a stained glass project I had in mind with my Pre-K class.

I gave my students a paper cut to the exact size of the vinyl sheet  with a frame I made with markers and we talked about each others favorite animals or favorite things. The students then drew their animals or things such as flowers, lions, pumas, etc.  within the frame and outlined it with a black marker. I placed the vinyl sheet on top and outlined their pictures with a black sharpie marker. While I was doing this with each child, everyone else colored their pictures while they waited for everyone’s vinyl sheet to be traced.

Next I showed them the ‘magic‘ paint (Plaid Gallery Glass window color) and showed everyone how to squeeze just the right amount to color in their pictures. I also demonstrated that an easy way to fill color into an area is to ‘squeeze and color in circles‘ -as the paint comes out they spread it around with the circular movements.

This was tricky at first but the kids got the hang of it in no time. Let them add quite a bit of paint and if the colors run into each other or go out of the lines a bit, all the better-the effect is wonderful!

When these dried the kids then put some dots and designs around the border to finish up. The beauty of vinyl is that it sticks to a glass surface quite easily and if you dampen the back a little it sticks even better.

The hallway windows outside my class looked fabulous with all the stained glass pictures.

What do you think?

Psst…

Art Lessons for Kids is on Facebook  and we are GROWING. Hit the  ”Like” button to show your LOVE  and join the conversation. You can also follow my adventures on Twitter (@Ms_Alejandra) or see what I am pinning over at Pinterest.

 Need art supplies for this lesson? Click on the link below to visit check out my new Shoppe!
ASFK banner Two 2014

Scratch Art Fun in Grade 1

Ny'a's Horse

Ny'a's Horse

Scratch art is one of those lesson kids of all ages LOVE to do and although it’s very easy for us teachers to buy the ready made scratch art paper, I much prefer my students to learn from ‘scratch’ how to make make their own.

I gave out 9×12 white paper and crayons and told the kids they had to fill the whole paper with different colors and designs. I reminded them that for their paper to be ‘magic’ they needed to color in heavily and the only color they couldn’t use was BLACK! It’s amazing what happens when you use the word ‘magic‘. The kids get excited with anticipation and are just transported to their own creative space.


The finished designs were gorgeous and if I had been doing a lesson on lines and design this would have been just great.  Next I gave out black crayons and told the the kids to cover their entire paper with black by coloring very heavily and trying to make sure no colors could be seen. They couldn’t believe they were covering up their designs!  (Note: I used black india paint with a previous class and it was very hard for them to scratch out a picture so I think a black crayon works better and the effect is stunning.)

Next, I gave out scratching tools like some wooden stylus’ and explained that this tool would help them draw and color anything on their paper while they were ‘scratching’  out their design.  I even made them blow on the tip of the tool for special effect.

The ‘ooohs’ and ‘aaahs’ are immediate as soon as they start to ‘draw’ and the vibrant colors start to appear magically before their eyes –this is priceless!

This lesson can be adapted to any age level so give it a go and forget about buying the ready made paper. This is more exciting and creative by far. Try to display them against a sunny window because the colors look shiny and they look gorgeous too!

Sebey's Scarab Beetle

Sebey's Scarab Beetle

Yasmin's Butterfly

Yasmin's Butterfly

Anisa's Penguin

Anisa's Penguin

If you know anyone that might find this post useful, I’d really love it if you share this with your fans or followers today. All it takes is a simple click on the ‘like’  and share buttons below. Thanks!

PS: Did you know Art Lessons for Kids has a Facebook page and you can follow my adventures on Twitter (@Ms_Alejandra)? Click on over!