The holidays are sadly over and it’s time to think about what to do the first week back at school. It’s always exciting to start a new school year but I need some inspiration soon as my brain is still at the beach in Thailand!
Anyway, I thought I would share with you some ideas I started with my previous year. All About Me themes are always popular in the elementary grades so here are some self portrait ideas that I hope will inspire you. I would love to hear some of your ideas too.
Here we go…
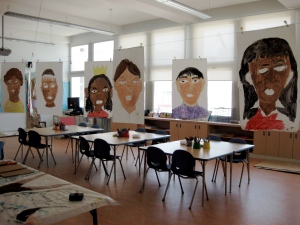
Giant self portraits in grade four
This was a fun project the kids loved. These self portraits were HUGE and a bit time consuming but very worth doing.
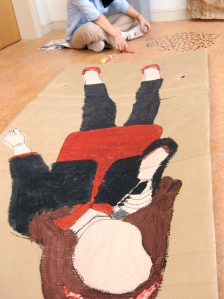
Cardboard life sized self portraits in grade five
I love cardboard and I remember the school was brand new at the time so there was tons of it everywhere. Being the recycle queen that I am ( and ALL art teachers are ) I decided why not make life sized self portraits with the grade five class? It was a hit!

Self portraits with construction paper in grade one
Grade ones loved making their life sized portraits with butcher paper. Get the kids into pairs and have them outline each other. This is also a great way for them to get to know each other. The kids paint in the details and then add a life sized photograph of their faces and you have a winner here!
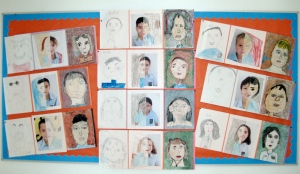
Progressive self portraits in grade two
These self portraits were awesome and showed a real improvement in facial placement. The grade twos did three progressive self portraits and were quite surprised to see how they got better with each try.
Need more ideas for your portraits and self-portraits theme? Check Fun with Self-Portraits and Fun With Self-Portraits II e-books you can download now and save tons of planning time.
Have fun!
PS: Are you a fan of Art Lessons for Kids Facebook page yet? Click here to join our FB family. See you there!